Tips to Use Nail Art Pen
This post may contain affiliate links, which means we may receive a commission if you purchase through our links. Please read our full disclosure here.
I am absolutely obsessed with nail art – problem is, save for Konad nail stamping, I really can't do it myself. Plus, I don't want to pay someone to do it – especially since a professional manicure won't last me for more than a week.
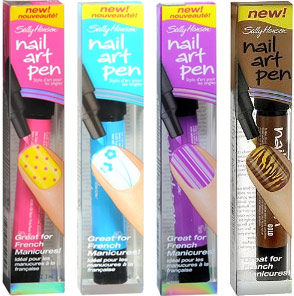
Over the weekend, after mindlessly looking at nail art on Tumblr, I decided to bite the bullet and buy Sally Hansen's Nail Art Penat Walmart for $7. I may not be a nail art pro with a brush, but with an easy-to-use pen? I thought I could make that work.
You can basically find these pens at any drugstore in the nail aisle. They come in a bunch of different colors (I went for black) including silver, white and pink. Fifteen minutes after purchasing mine, I was back at my apartment and ready to start drawing amazing (or, you know, kind-of cool) patterns on my nails.
My Experience:

The nail art pen is exactly what it sounds like – an actual pen with a pointy tip. If you've ever used a felt-tip marker or a concealer pen, you know what you're doing.
My one gripe with the pen is that it took a while for the product to get to the tip – I actually thought it was defective at first. However, once it's running, the pen really gives you a perfect amount of nail polish – enough to draw with but not too much so that it will run.
The color was also super-opaque, which is a huge plus. I had my roommate write letters on each of my already-painted nails (thanks, MB!) which took all of five minutes and looked great and seemed to dry pretty fast. Because I didn't want the polish to run, I decided to wait an extra-long time (45 minutes) before applying top coat, during which I just lazed around watching Spice World.
When I was ready to apply top coat, I saw that almost all of my 'nail art' had somehow wiped off, even though I hadn't done anything that would have caused that to happen – annoying, right? After another quick application, however, and top coat ten minutes after that, my polish plus the nail art stayed put for the same time as a regular manicure.
Sally Hansen Nail Art Pen Review:
This should be obvious, but Sally Hansen's Nail Art Pen did not make me a nail art pro. It did, however, give me an easy way to make basic designs like dots or stripes on my nails.
If you're decent at drawing, I would definitely recommend trying one of these pens. If you're really, really good, then you can just buy a special paint brush – the girls from Hey, Nice Nails! use a 12/0 Round Brush ($5.48 at Amazon) for their fine detail. Since I'm not so artistic, I'm not sure I'd buy one of these again – at least until I get better at using the one I have.
Overall, if you're looking for a fun way to change up your nails, then buy one of these pens – they're definitely worth it – but understand that nail art isn't easy and it'll take lots of trial and error to get right! And make sure to use a top coat – this stuff can easily wipe off if you don't.
What do you guys think?
Would any of you use this nail art pen? Have any of you tried it? Tell me everything and more in the comments!
Source: https://www.collegefashion.net/beauty-and-hair/i-tried-it-sally-hansen-nail-art-pen/
0 Response to "Tips to Use Nail Art Pen"
Post a Comment